Send Funds from Electrum using COLDCARD via MicroSD Card (~5 min)
-
Open the Electrum COLDCARD signing wallet you previously created
-
Click on the
Sendtab -
Enter the recipient's address in the
Pay tofield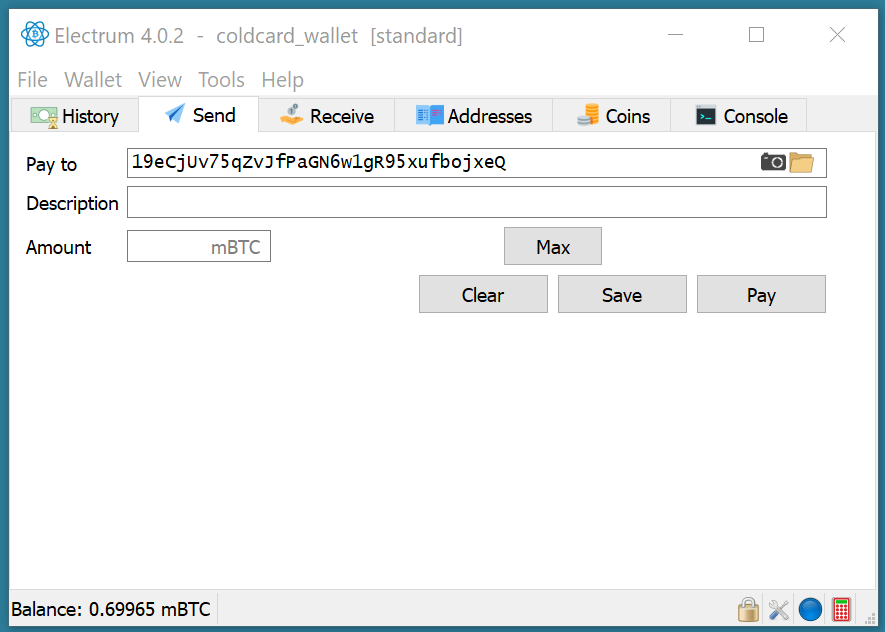
- Tip: Use the camera icon to scan a QR code of the recipient's address
-
(Optional) Enter a description to be stored only in the local Electrum wallet file (this can only be stored unencrypted, unfortunately)
-
Enter
AmountinmBTC(1000th of a BTC) -
Click the
Paybutton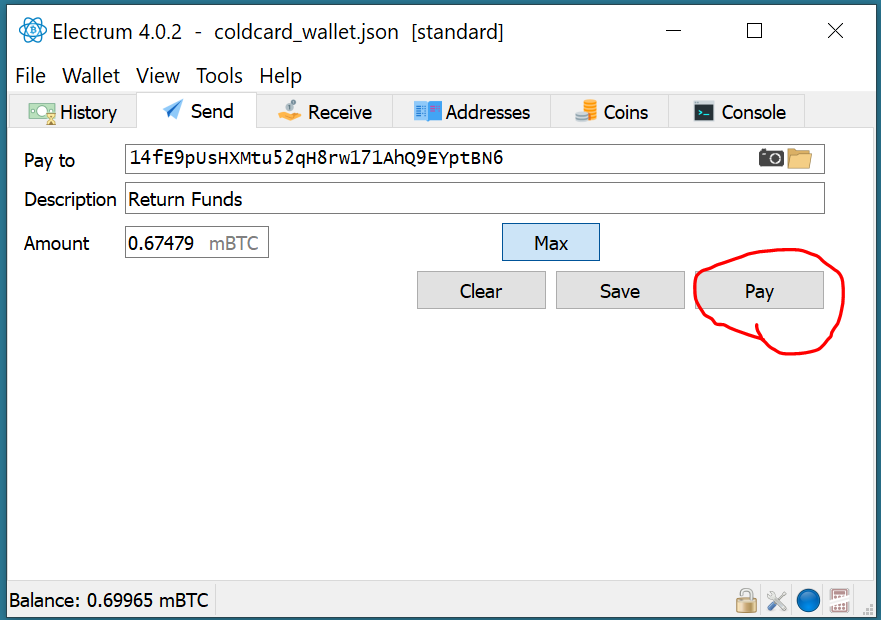
-
Click the
Advancedbutton in theConfirm Transactiondialog box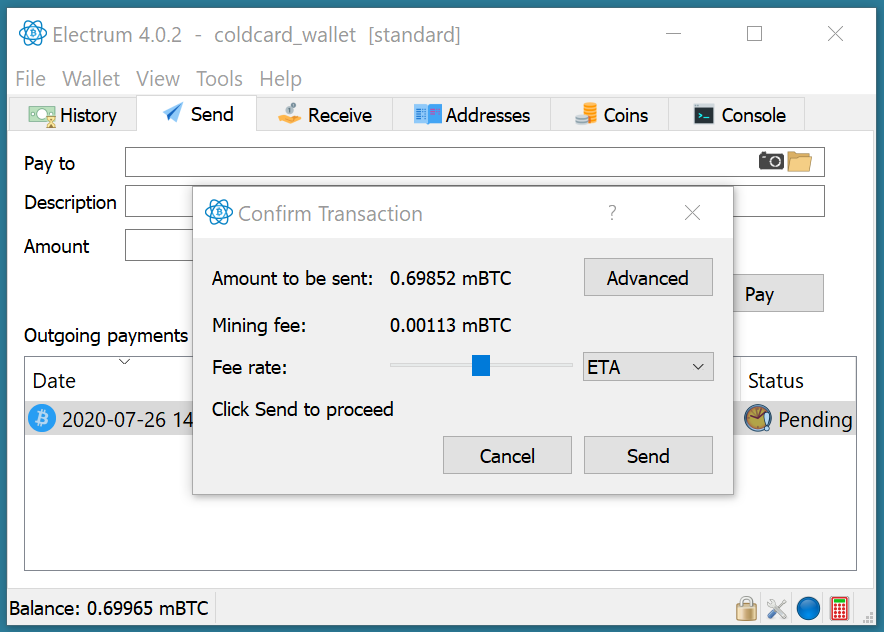
-
Adjust the fee as necessary and click the
Finalizebutton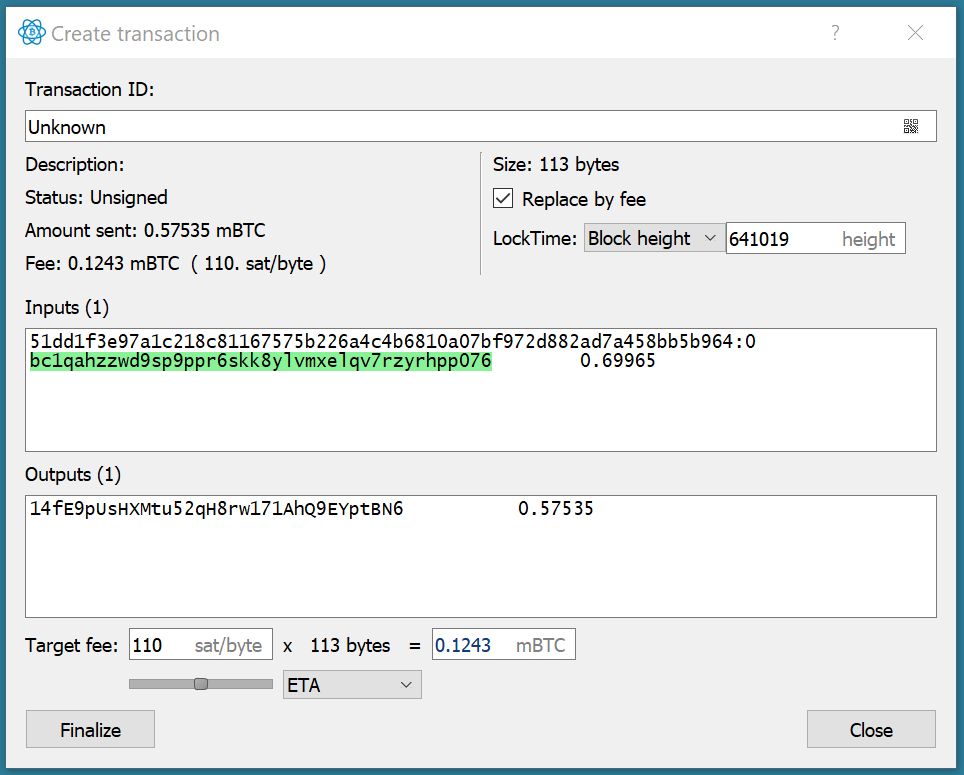
-
Click the
Exportmenu-button and selectFor hardware device; include xpubs>Export to file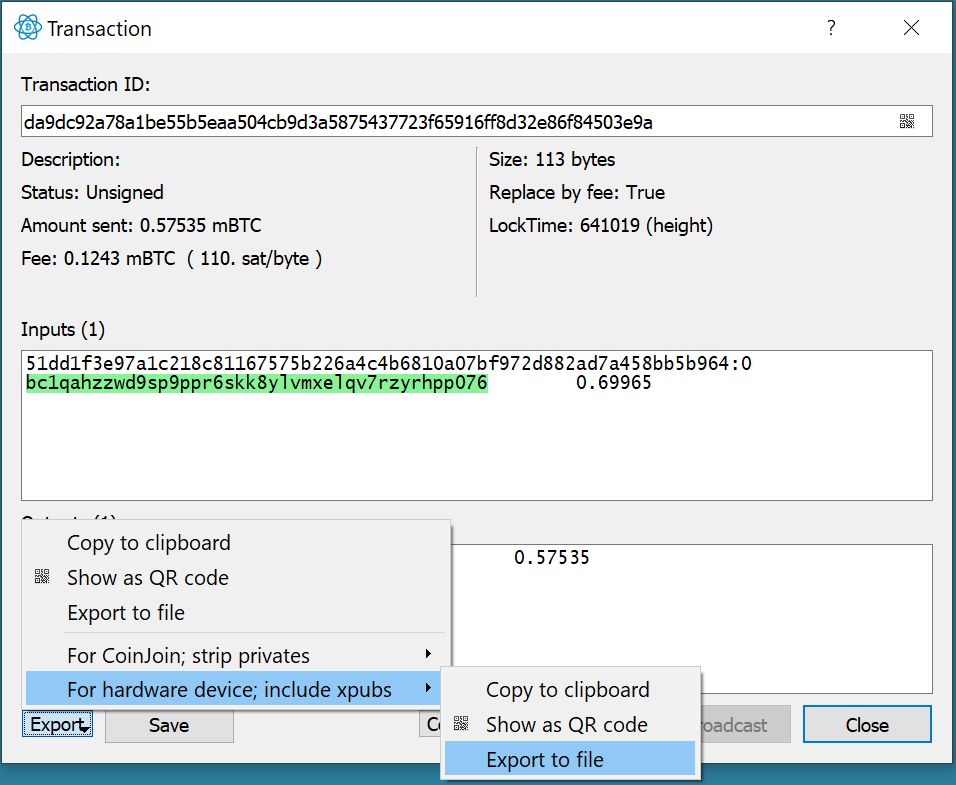
-
Browse to the microSD card to save the
.psbtfile to the microSD card and clickSave
-
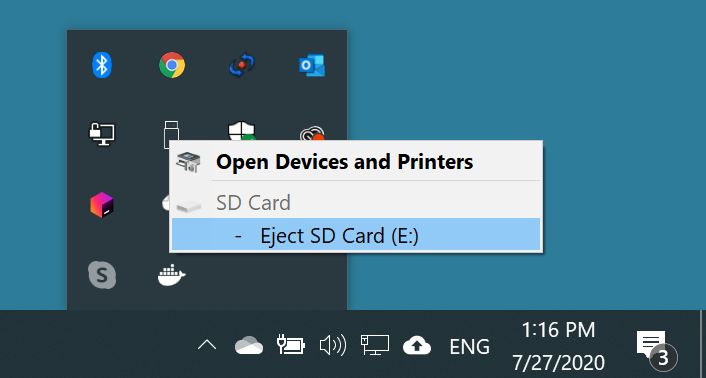
Safely eject the microSD card using the icon in the Windows Desktop Tray
-
Physically remove the microSD card and insert it into the COLDCARD for signing
-
On the COLDCARD, press
Xas many times as necessary until you are returned to the main menu -
Select
Ready to Signand press[CHECK] -
Review and approve the transaction for signing
-
Verify the amount!
-
Verify the recipient address! Double and triple-check!
-
Verify the network fee! (It should be relatively small; something on the order of 0.00000500 BTC)
-
Press
[CHECK]to approve the transaction- The COLDCARD will display a
PSBT Signedmessage, including:-
The filename of the signed transaction (e.g.
coldcard_wallet.json-20200727-1331-signed.psbt). This file is useful in a case of a transaction that requires multiple signatures. In such a case, you would pass this file around to the signatories for signing until it contains a signature from each one. (NOT our case) -
The filename of the finalized transaction (e.g.
coldcard-wallet.json-20200727-1331-final.txn). This file contains a fully-signed transaction, ready for broadcast to the Bitcoin network. (This is the file we're interested in).
-
- The COLDCARD will display a
-
Press
[CHECK]to return to the main menu
-
-
Eject the microSD card from the COLDCARD and insert it into the computer
-
From the Elecrum menu, select
Tools>Load transaction>From file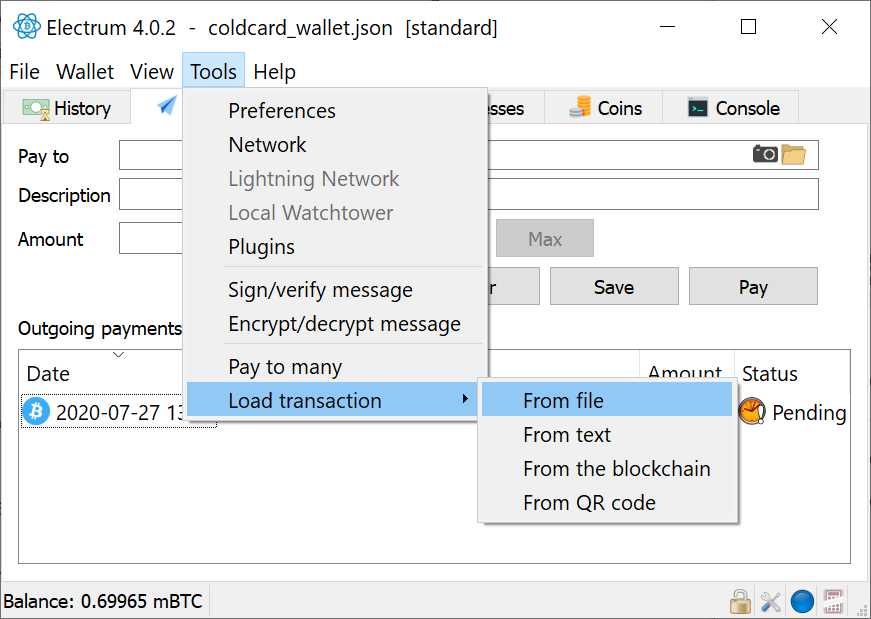
-
Browse to the microSD card, select the file ending
-final.txnand clickOpen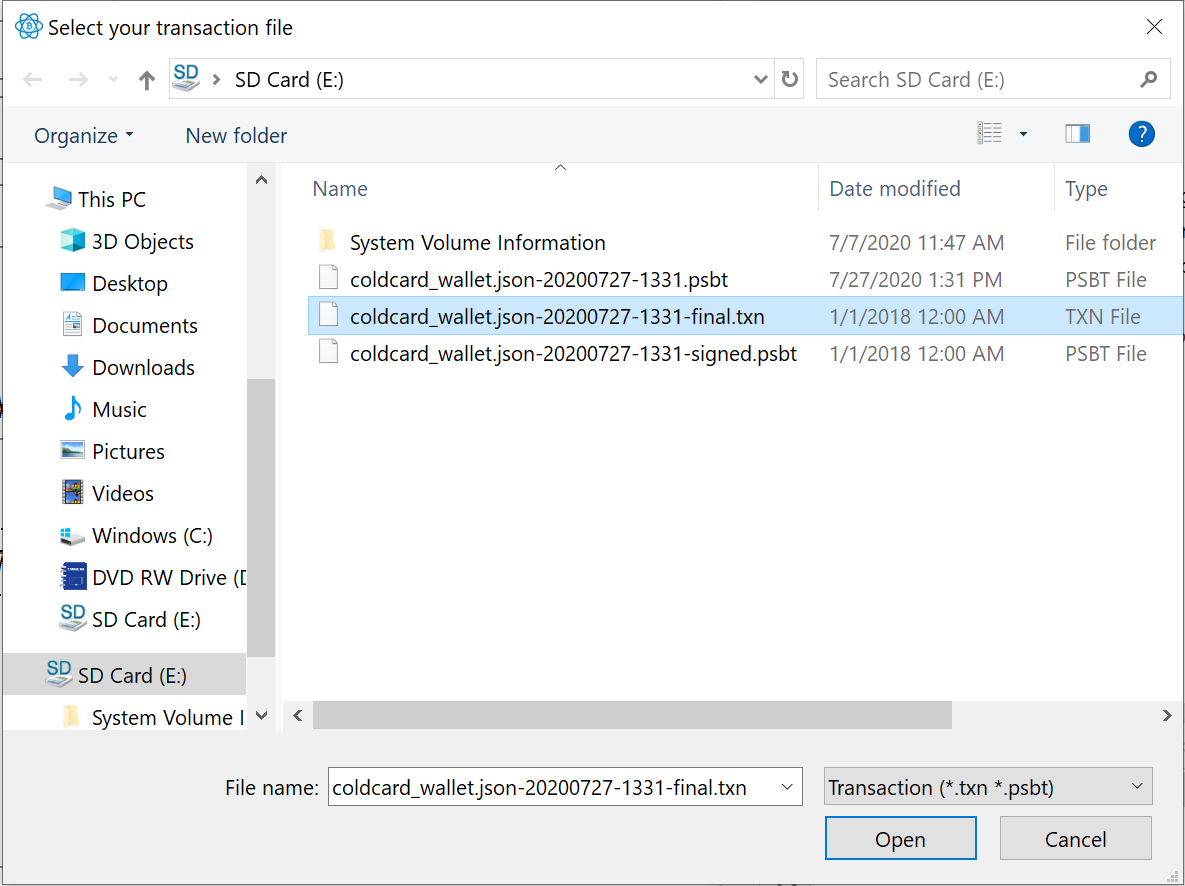
-
Click
Broadcastto broadcast the transaction to the Bitcoin network -
Electrum will broadcast the transaction and display the transaction ID
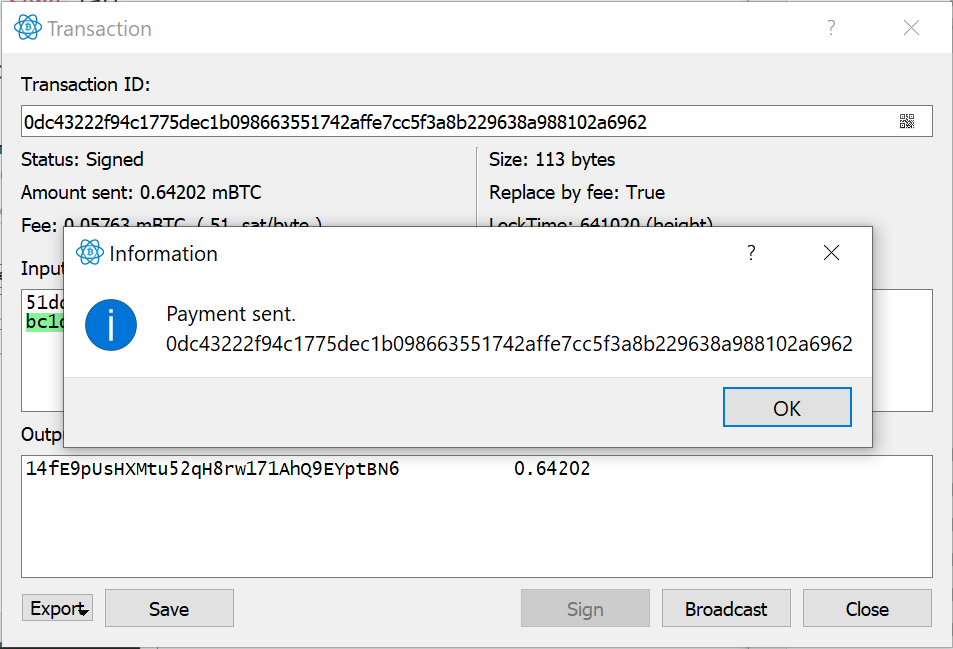
- Note: You have just broadcast a transaction out to the Bitcoin network through your own node; in the most private way possible!
-
Open up your private block explorer on the Tor Browser and lookup this transaction to confirm (either using one of the addresses or the transaction ID)
-
There's also no harm in searching for the Transaction ID on a 3rd party block explorer using an onion link via the Tor Browser
-
Blockstream.info's onion url is: explorerzydxu5ecjrkwceayqybizmpjjznk5izmitf2modhcusuqlid.onion
-
If you search for more than one piece of information on a 3rd party block explorer, it's best to switch to a new Tor identity between requests by clicking on the
New Identitybutton so that the explorer can't learn that there is a relationship between two addresses or seemingly-unrelated transactions
-
